I'm going to cover just the fundamentals of printer settings in this post so you can better understand why and how your junk journal papers and scrapbook ephemera print the way they do.
If you want to learn more about this topic, keep reading.
First things first, how do you find your printer settings?
Head on over to your Settings > Devices > Printers & Scanners or Control Panel > Hardware and Sound > Devices and Printers.
You can also search for "printer" in your windows 10 search bar at the bottom of your screen.
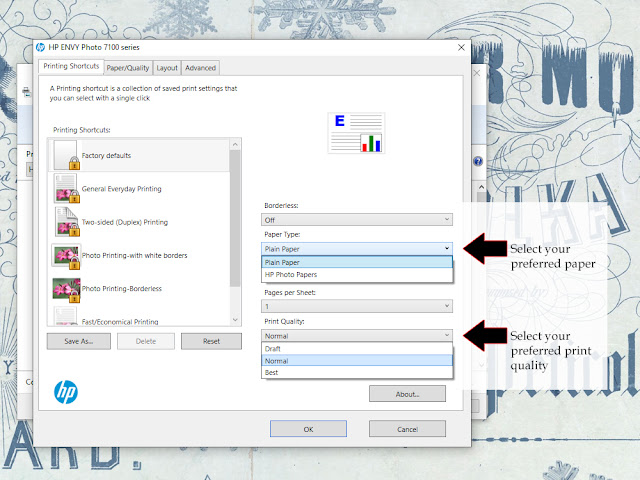
As for me, I change my settings with every print I make according to my project. When I right click the file(s) I want to print I select print then click on Options...>Printer Properties...
Your settings window may look a little different than this, but you will see a "paper type" and "print quality" options. This is all you need to change. As you get more comfortable with your printer you can change up other settings.
What printer setting should you use for your printable?
Now that you know how to change your printer's settings, it's time to have some fun.
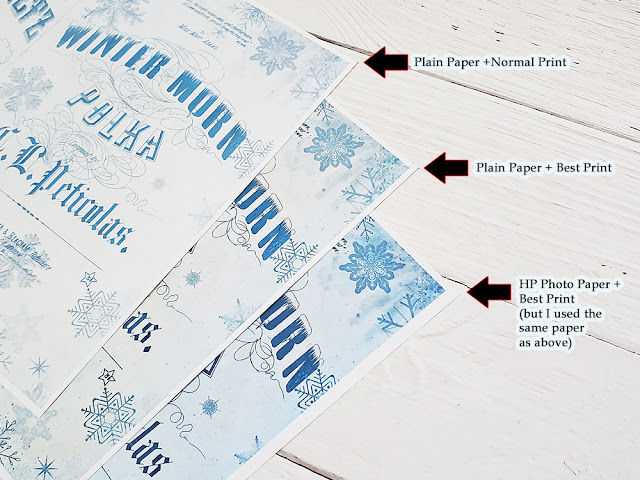
Please note that for this little test I used the same paper and printer for all the pages.
I am using the basic of basic paper - Xerox 20lb paper with a brightness of 92
I am using a HP Envy Photo 7155 printer (I love this printer because of the ink subscription program)
I'm using the same printable junk journal paper from the Winter Songs junk journal paper set from Calico Collage's Etsy shop
You can clearly see the difference between the junk journal papers with the a simple change of the settings.
Lets look a little closer at the individual pages.
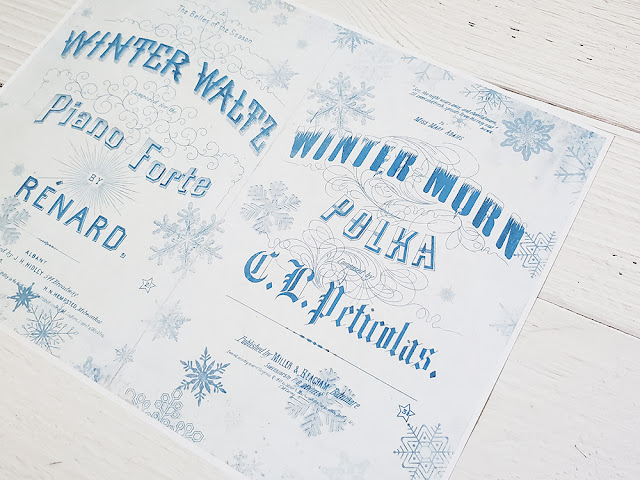
It's very light, and it's hard to see the image's fine details, but I can still read the decorative text. This setting would be extremely useful for someone creating a vintage junk journal or worn styled shabby chic project.
This page settings were Plain Paper + Best Print.
This is my preferred setting. When you select Best Print, it will take a little longer for your printer to print. This is due to the fact that it is printing more finer details of the design and using more ink to do so. This is why the print appears darker. This, I believe, is a more happy medium print setting that is very universal.
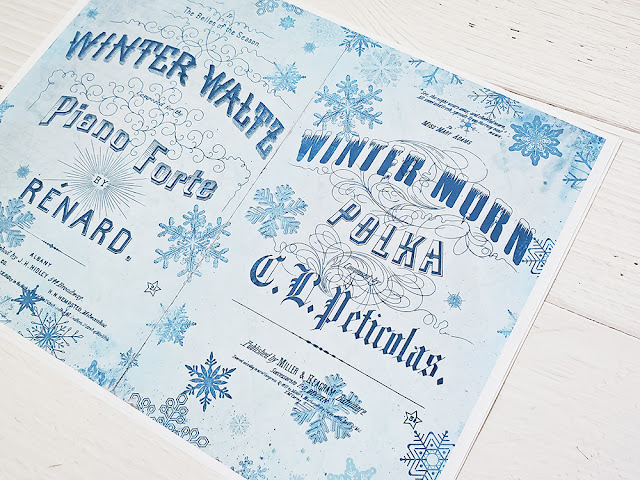
This page settings were HP Photo Paper + Best Print.
Oh my isn't that much richer, but still so pretty. The reason why this printed much darker is because the printer thinks it is printing on heavy duty glossy paper, so it is using more ink. This setting does take a lot longer to print because it is making sure to get all the fine details. I wouldn't suggest this setting if your digital downloads are already dark in color, by doing so may drown out the over all design.
What I want you to take from this.
Don't be afraid about changing up your settings. And do not feel you have to use the type of paper you selected. I used the same 20lb paper in all these tests. Play and have fun!
***
Thank you for stopping by and I hope that you are following Calico Collage on social media.
you can find Calico Collage on Instagram and Pinterest: @calicocollage
If you are a fan of Calico Collage, come join the Facebook Group - Fans of Calico Collage
If you are a BIG fan, make sure you are on the VIP mail list to receive exclusive freebies and coupons.


